Designing the screens in a game can seem tricky when you have no background in art or layout. You worry about colors clashing or buttons feeling hard to find. The truth is smart design tools now handle the heavy work for you. You simply tell the tool in plain words what your game is about and what you want on screen. It creates the menus, buttons, and messages right away. You then make small changes with easy clicks until everything looks and works just right. This guide takes you through the full process step by step. You will end up with screens that guide players smoothly and make your game more enjoyable. No drawing skills or expensive software are needed.
If you want to see how a clean and simple interface works in a real puzzle game, try this anime puzzle journey on Astrocade.
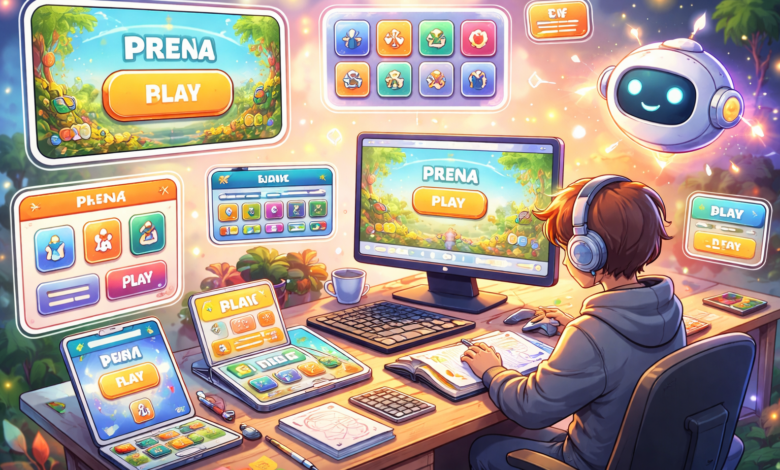
Understanding What Game Screens Should Do
Game screens are what players look at and interact with the whole time. The main menu welcomes them and lets them start playing or change settings. The play screen shows the action along with important info like health or score. Pop-up messages give hints or warnings. Every screen needs to feel clear so players instantly know what to do. Important information should be big and easy to reach. Colors should match the game’s mood without straining the eyes. Buttons need to stand out and respond when clicked so players feel in control. A screen that’s too crowded confuses people. One that’s too empty feels unfinished. The goal is balance. These AI tools already know the rules that work for different types of games, so you can focus on your story and ideas while the tool handles the layout.
Picking the Best Smart Tool for Beginners
Start with a tool built for people who are new to design. Look for one where you can just type normal descriptions instead of dragging shapes or picking colors from charts. It should give you results quickly so you can test ideas right away. Automatic saving and the ability to compare different versions side by side are also helpful. The tool should run on a regular computer or laptop without needing fancy hardware. It’s a bonus if it has ready-made examples for main menus, pause screens, and score displays. Tools like Astrocade keep things simple for beginners with clear steps and fast changes. Once you pick one, spend ten minutes clicking around the basics. You’ll feel comfortable pretty quickly.
Explaining Your Game Idea to the Tool
Tell the tool about your game in plain sentences. Mention the game type, the overall mood, and what players will do.
For example: This is a calm farming adventure with soft greens and yellows, or it’s a fast racing game with bright reds and bold text. The tool uses those words to create the first version of your screens. Be specific about where buttons should go and what text should appear on them. Say if you want the screens to work well on phones or computers. The more details you give upfront, the closer the first result will be to what you want. If the tool asks questions, answer them. You can always change the description later and generate a new version. It feels like chatting with a helpful friend who never gets tired.
Setting the Colors and Style for Your Screens
Once the tool shows you the first screen, you can adjust the overall look.
- Pick one main color that sets the mood and use it for backgrounds or frames so everything feels connected.
- Choose two or three extra colors for buttons and text that stand out clearly against the background without hurting your eyes.
- Make sure text size is readable on both big monitors and small phone screens.
- Add simple shapes or light lines around important areas to guide the player’s eyes without making the screen feel busy.
Building the Main Menu Screen
The main menu is the first thing players see, so it should welcome them and make it easy to start.
- Put the game title at the top in large, clear letters that match the game’s style.
- Place the biggest button in the center with the word “Play” or “Start” so no one misses it.
- Add smaller buttons on the side for settings, how to play, and quitting.
- Include a small area for background art that shows the game world without covering the buttons.
Designing Screens During Play
Screens players see while actually playing should only show what matters right then.
- Put health and score in the corners so they’re visible but don’t block the action.
- Place action buttons near where thumbs rest on phones or near the bottom on computers.
- Use clear icons instead of long words whenever possible – pictures are understood faster.
- Make goal messages or warnings appear in the center briefly, then fade away.
Adding Buttons That Feel Natural
Buttons are how players interact with the game, so they need to feel good to press.
- Make them large enough for fingers to tap easily on any device.
- Add a slight color change or glow when the mouse hovers or a finger touches them so players know it’s ready.
- Keep the same style for every button across all screens so players learn it once and remember it.
- If your game supports sound, add a soft click or quick shake when pressed for extra feedback.
Testing Your Screens on Real Devices
After the screens look good on your computer, check how your online game works on the devices players will actually use. Open the same project on a phone and a tablet if possible. Walk through the full game flow from the main menu to the end screen. Notice if text becomes too small or buttons overlap on smaller displays. The smart tool usually has a preview mode that shows the screens exactly as they would appear on different devices. Use that preview first and fix any issues before testing on real hardware. Ask friends or family to try the screens and tell you what feels confusing. Their fresh eyes catch problems you might miss after working on the design for hours.
Fixing Issues Before Players See Them
Even with smart tools, a few common problems can pop up. If a screen loads slowly, ask the tool to simplify the background art. If colors look off on different screens, pick ones that work everywhere. If people say they can’t find a button, move it higher or make it bigger. Go through every screen one last time and imagine you’re playing for the first time. Fix anything that slows you down or confuses you. The tool keeps earlier versions, so you can always go back if a change doesn’t work. Save your final screens and export them into your game.
Wrapping Up Your Design Work
You now know how to create every screen your game needs without any design training. The process starts with a clear description, moves through simple adjustments, and ends with testing to ensure everything works well. Each step builds on the last, so you stay in control throughout. Whether you build games on a no-code platform or just want to improve them, these steps turn rough ideas into polished screens that players love. Take your time with your first project. The more you practice, the faster and more confident you’ll get. Soon you’ll be creating new screens in minutes instead of days.
Your game deserves screens that feel as good as the gameplay itself. With these methods, you can deliver that experience every time. Players will notice the care and stick around longer because moving through menus and play areas feels natural.
READ ALSO: Fortnite Skin Unlocks: Complete Guide to Rare and Legendary Outfits